First, follow the instructions to setup Wireguard if you haven’t already done so using my guide. You may also need to update your system:
sudo apt update
sudo apt upgrade
Installing Pi-hole is very simple. My preferred method is to install from Git using the instructions below. Other instructions are available at the Pi-hole website.
git clone --depth 1 https://github.com/pi-hole/pi-hole.git Pi-hole
cd "Pi-hole/automated install/"
sudo bash basic-install.sh
Installing Unbound
More information about the purpose of Unbound is available on Pi-hole’s website. Essentially, Pi-hole with Unbound adds an additional layer of privacy and security to your network by lessening the possibility of a man-in-the-middle attack as well as preventing public DNS from potentially logging your DNS queries and tracking you.
First, install the Unbound daemon:
sudo apt install unbound
Then, you’ll want to install the root hints:
wget https://www.internic.net/domain/named.root -qO- | sudo tee /var/lib/unbound/root.hints
By default, Unbound is not configured for IPv6. The configuration file shown below is modified from the one on the Pi-hole documentation to allow for IPv6 use. Copy the entire contents below to the file /etc/unbound/unbound.conf.d/pi-hole.conf.
server:
    # If no logfile is specified, syslog is used
    # logfile: "/var/log/unbound/unbound.log"
    verbosity: 0

    interface: 127.0.0.1
    interface: ::1
    port: 5335
    do-ip4: yes
    do-udp: yes
    do-tcp: yes

    # May be set to yes if you have IPv6 connectivity
    do-ip6: yes

    # You want to leave this to no unless you have *native* IPv6. With 6to4 and
    # Terredo tunnels your web browser should favor IPv4 for the same reasons
    prefer-ip6: yes

    # Use this only when you downloaded the list of primary root servers!
    # If you use the default dns-root-data package, unbound will find it automatically
    #root-hints: "/var/lib/unbound/root.hints"

    # Trust glue only if it is within the server's authority
    harden-glue: yes

    # Require DNSSEC data for trust-anchored zones, if such data is absent, the zone becomes BOGUS
    harden-dnssec-stripped: yes

    # Don't use Capitalization randomization as it known to cause DNSSEC issues sometimes
    # see https://discourse.pi-hole.net/t/unbound-stubby-or-dnscrypt-proxy/9378 for further details
    use-caps-for-id: no

    # Reduce EDNS reassembly buffer size.
    # IP fragmentation is unreliable on the Internet today, and can cause
    # transmission failures when large DNS messages are sent via UDP. Even
    # when fragmentation does work, it may not be secure; it is theoretically
    # possible to spoof parts of a fragmented DNS message, without easy
    # detection at the receiving end. Recently, there was an excellent study
    # >>> Defragmenting DNS - Determining the optimal maximum UDP response size for DNS <<<
    # by Axel Koolhaas, and Tjeerd Slokker (https://indico.dns-oarc.net/event/36/contributions/776/)
    # in collaboration with NLnet Labs explored DNS using real world data from the
    # the RIPE Atlas probes and the researchers suggested different values for
    # IPv4 and IPv6 and in different scenarios. They advise that servers should
    # be configured to limit DNS messages sent over UDP to a size that will not
    # trigger fragmentation on typical network links. DNS servers can switch
    # from UDP to TCP when a DNS response is too big to fit in this limited
    # buffer size. This value has also been suggested in DNS Flag Day 2020.
    edns-buffer-size: 1232

    # Perform prefetching of close to expired message cache entries
    # This only applies to domains that have been frequently queried
    prefetch: yes

    # One thread should be sufficient, can be increased on beefy machines. In reality for most users running on small networks or on a single machine, it should be unnecessary to seek performance enhancement by increasing num-threads above 1.
    num-threads: 1

    # Ensure kernel buffer is large enough to not lose messages in traffic spikes
    so-rcvbuf: 1m

    # Ensure privacy of local IP ranges
    private-address: 192.168.0.0/16
    private-address: 169.254.0.0/16
    private-address: 172.16.0.0/12
    private-address: 10.0.0.0/8
    private-address: fd00::/8
    private-address: fe80::/10
To start unbound and run it on system startup, type:
systemctl enable unbound
systemctl start unbound
Change the DNS on your local system and enable DNSSEC
To do this, you will need to edit /etc/systemd/resolved.conf. Change it to look something like this:
[Resolve]
# Some examples of DNS servers which may be used for DNS= and FallbackDNS=:
# Cloudflare: 1.1.1.1#cloudflare-dns.com 1.0.0.1#cloudflare-dns.com 2606:4700:4700::1111#cloudflare-dns.com>
# Google:     8.8.8.8#dns.google 8.8.4.4#dns.google 2001:4860:4860::8888#dns.google 2001:4860:4860::8844#dn>
# Quad9:      9.9.9.9#dns.quad9.net 149.112.112.112#dns.quad9.net 2620:fe::fe#dns.quad9.net 2620:fe::9#dns.>
DNS=127.0.0.1
#FallbackDNS=
#Domains=
DNSSEC=yes
DNSOverTLS=yes
#MulticastDNS=no
#LLMNR=no
#Cache=no-negative
#CacheFromLocalhost=no
DNSStubListener=no
#DNSStubListenerExtra=
#ReadEtcHosts=yes
#ResolveUnicastSingleLabel=no
Note the DNS line. Change it to localhost (127.0.0.1) and uncomment it if necessary. Also uncomment the DNSSEC line and DNSOverTLS lines and set them both to yes. When done, save the file and run:
systemctl daemon-reload
To check that your configuration has been applied, run:
resolvectl status
You should see something like this:
Global
       Protocols: -LLMNR -mDNS +DNSOverTLS DNSSEC=yes/supported
resolv.conf mode: uplink
     DNS Servers: 127.0.0.1

Link 2 (eth0)
    Current Scopes: DNS
         Protocols: +DefaultRoute +LLMNR -mDNS +DNSOverTLS DNSSEC=yes/supported
Current DNS Server: 127.0.0.1
       DNS Servers: 127.0.0.1

Link 3 (wg0)
Current Scopes: none
     Protocols: -DefaultRoute +LLMNR -mDNS +DNSOverTLS DNSSEC=yes/supported
Configure Pi-hole
To configure Pi-hole, go into your brower and enter the IP of the machine it is installed on. If you installed a web browser, your pi-hole is web accessible. The login password is provided at the end of the install script. I recommend you change this password after you login for the first time to something more secure.
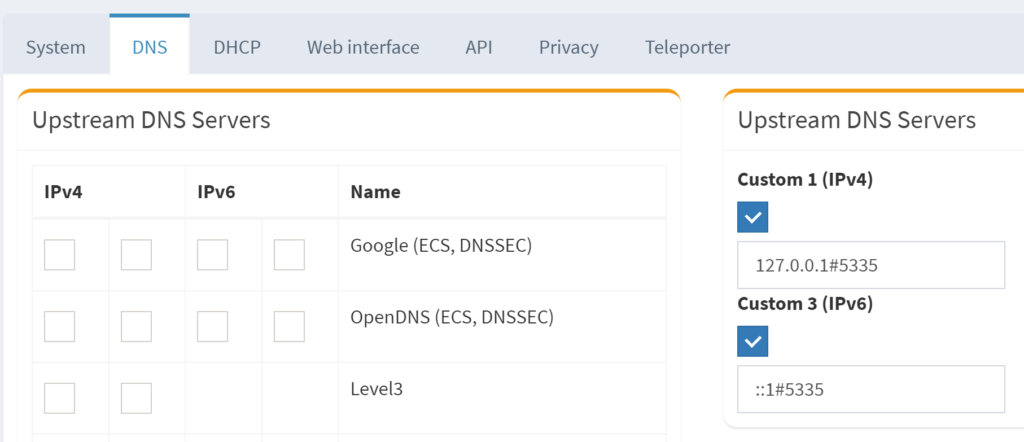
You will need to configure your Pi-hole to use local DNS (unbound). Since we configured IPv6, you will setup a custom DNS entry for both IPv4 as 127.0.0.1 and for IPv6 as ::1. Both will use the default port of 5335 unless you changed the port.
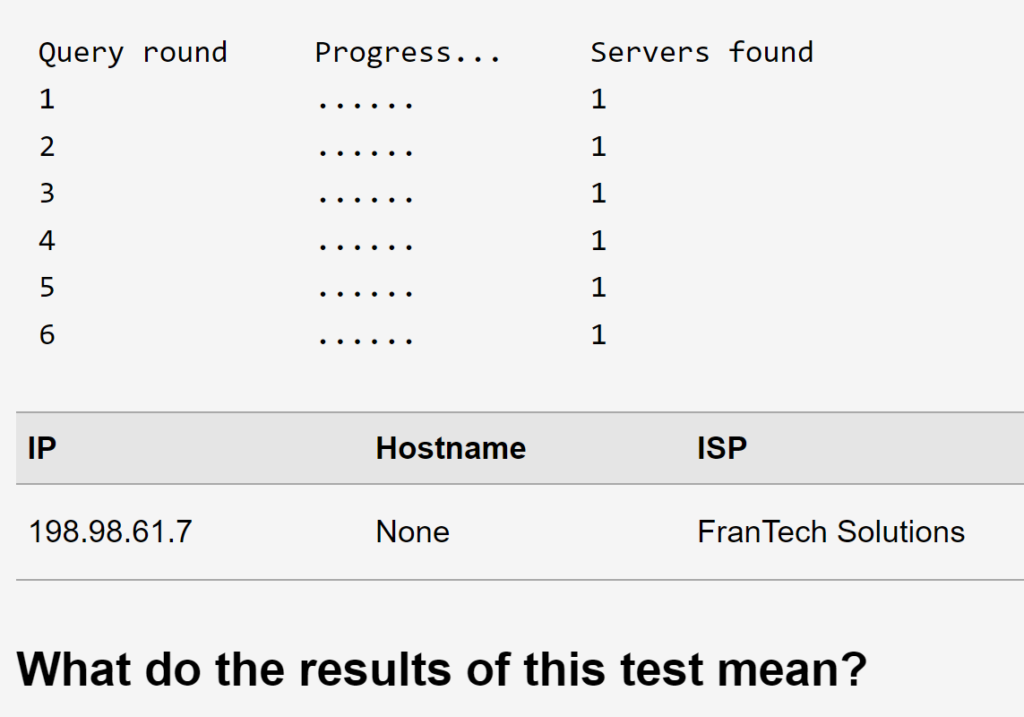
Test for DNS Leaks
Test for DNS leaks at DNSLeakTest.com. If you see any other servers in the list other than your own IP, you have a DNS leak and you need to check your network configuration settings. There are many possible reasons for a DNS leak. If you are using Wireguard in Windows, I have a possible solution for you to consider.
Fixing DNS Leaks in Windows with Wireguard
If you’re using the Wireguard client in Windows to connect to your VPS, the hardwired ethernet or wifi adapter in windows will have DNS setup. This DNS will be added to a list of DNS servers in addition to the DNS servers for the Wireguard virtual adapter that is used by the OS to allow you to connect to your VPS. The fix is to set both IPv4 and IPv6 DNS to localhost (127.0.0.1 and ::1). If you want DNS on your machine when you are not connected to your VPN, Cygwin has an available unbound package that you could use as a workaround.
This completes the tutorial.